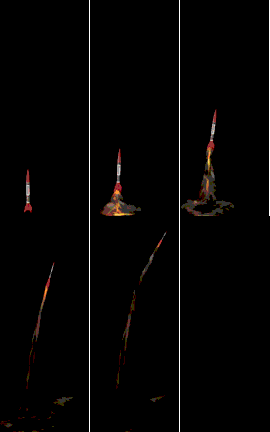
Monday, July 9, 2007

!!! RAY'S ROCKET HOMEPAGE !!!


Ray's Launch 1: Distance From Rocket: 100 ft
Angle of Altimeter: 75 Degrees
Rocket Height at Apogee: 27 ft
Time To Apogee: Unknown
Ray's Launch 2: Distance From Rocket: 100 ft
Angle of Altimeter: Unknown
Rocket Height at Apogee: Unknown
Time To Apogee: Unknown
Kenshiro's Launch 1: Distance From Rocket: 100 ft
Angle of Altimeter: 75 Degrees
Rocket Height at Apogee: 27 ft
Time To Apogee: Unknown
Kenshiro's Launch : Distance From Rocket: 100 ft
Angle of Altimeter: Unknown
Rocket Height at Apogee: Unknown
Time To Apogee: Unknown

During the next 3 weeks at Hong Kong International School, our class will be making a water rocket. Our teacher, Ms. Nelson, is planning to launch our rockets on Tuesday, July 26 at the Tai Tam field. Before we launch our rockets, we learned a lot of things during class, such as Newton's 3 laws of motion which are 1. An object at rest will remain at rest and an object in motion will remain at motion at constantly velocity unless acted by an unbalanced force,2. Force=Mass x Acceleration,and 3. For every action there is an equal and opposite reaction.We also learned how to make handmade altimeters, make mini rockets using Alka seltzers, and much, much more .These are some websites that you would like: (Please click on any of these that you would like to go.....)
http://homepage.ntlworld.com/telescope/Rocketweb/Launcher.htm
http://ourworld.compuserve.com/homepages/pagrosse/h2oRocketIndex.htm
http://www.h2orocket.com/
OR,......
http://dogrocket.home.mindspring.com/WaterRockets/index.html
(Once you looked at these pages, you should know a lot about water rockets)

LOOK BELOW FOR MY RESULTS WHEN I LAUNCHED MY WATER ROCKET......
This is the results I got when I launched my rocket:


THANK YOU FOR LOOKING AT MY WEBSITE!!!!!!!
HOPE YOU LIKED IT!
SEE YOU!!......

Evelyn's Hydro Rockets page

myspace


In Hydro rockets we are making a rocket that runs on water. This class is really cool because we get to make a rocket that runs of water entirely of our own!
myspacemyspacemyspace

Some people say that physics are reeeeeeeeeeeeeeeeeally boring but I find that if you add in a few easy experiments that don't require to much brain power.

myspace

Some things that require some brain power: Newtons Law of motion (there are three laws): 1.An object at rest will remain at rest and an object in motion will remain in motion at constant velocity unless acted upon by and unbalanced force. Simplified version: 1. An object that is not moving will not move and an object that is moving will remain moving at a constant speed until someone or some thing does something to it. 2. for
ce = Mass x Acceleration (F = M x A)
simplified: turbo boost x an object = force (I hope thats right) 3. f
or every action there is and equal and opposite reaction. Simplified: (can't think of any thing)
myspace

This is my table of what happened when we blasted off the rockets,

sadly, no one measured my rocket's hight so I had to make lots of crosses on the chart.

On the second launch me and Katerina( my buddy for the blast off) combined rockets because I ripped out some stuff on the first blast thinking that I only had to do one blast off.


myspace

OK, here are a few links you could try to learn more about Hydro rockets:

http://www.miranda.org/~evand/hybrid/construction.html

http://www.nationalroboticschallenge.org/downloads/recources/Bottle_Rocket_Launcher.pdf

http://www.cesa1.k12.wi.us/Technology/TeachGrants/downloads/EXCELeratingHydroRockets.pdf for the website above: it may look really boring but if you go to the bottom of the page they have templates and stuff to help you under stand about HYDRO ROCKETS

myspace
Animated GIFs

JJ Blogwriter


This Class (Hydro Rocket Science)in a Nutshell:
Hydro Rocket Science is a fun summer program for students in Grades 5-8. We work, we play, we have fun. First we learn the facts, the concrete evidence, and experiment with it. Then we really build the hydro rocket with materials, and use abstract thinking to complete this hefty task. Finally, we launch it on launch day, and look with excitement, waiting for the rocket to land.
Image from: http://www.dan-dare.org/
The Details
The Experimenting
The Experimenting started on the first day, and we started to learn some physics and chemistry about the science of flying. We used a balloon and very little materials to make wings, stands for the rocket to try to make it go straight and far. As I look at the others fly their rockets through the hallway, I found out that all of them have little bits that didn't really work for them. Some had materials that were too sharp and popped the balloon, some had too much weight and soon fell to the ground before anyone else's, and others, just had too much drag and then reduced its speed by quite a bit. I think our theories all come to the fact that the wings or the stands of the rocket needs to be low, needs to be light, and needs to be quite drag-resistant. The best design would be the real rockets' design, which is a obtuse angled leg that stands on the ground to hold the rocket up on the launch pad, and 4 of them standing on each side of the rocket (although it's round). Let one of be on 0 degrees, one on 90, one on 180, and one on 270 degrees. Symmetrically, that is very correct, and hopefully will bring stability to the plane when it goes high up into the air.
The next experiment we did was on the second day, and was to experiment with the parachutes, or the recovery system that we need to put on our rocket. The parachutes need to be round, symmetrical and the canopy needs to be large and easy to resist on air. A hole is probably needed in the center of the canopy and that would probably bring the parachute and the tennis ball in the landing part of the rocket back to me, so I could recover it. Although I didn't create a parachute yet, but I have an idea ready for my parachute already, and I will put it in use once I finish my rocket. Hopefully this will work when I launch my rocket.
All these experiments are helpful to the launch of my rocket on launch day. The drag prevention, the thrust and acceleration, the recovery system, the nose cone design will all affect how I build my rocket and how my results will be, in comparison to if a rocket was really well or really poorly built. Whenever there is information, it would be taken and used for any other future projects, and this would apply to this project. All this design information will force the best of our building plans and hopefully bring out a really good rocket show on our launch day.
Plans on building rocket before the initial beginning of work
For this rocket, I have many plans on how this should be built, but one outstands all the others and it seems like I am probably going to use it to build my rocket. Whenever you build, you need a "blueprint" plan, and then you should start your building. So beforehand, I have come up with some plans at home, due to my lack of activities to do at home (after 3 hours of this course), some designs are very inappropriate, a lot of drag, or a lot of weight on the rocket. One plan though outstands the other (as I said earlier), and that would be a design that is very similar to a modern day rocket. The stands of the rocket are in an obtuse angle with the flat end on the floor that holds it up.
The Initial Construction
Parachute Construction

Today, July the 12th, we continued to build our parachutes for our recovery system on our rocket. The parachute's material is a regular trash bag, which is a material that can fall down slowly from high altitudes. What I have done so far with my parachute is that I have cut out a large circle, folded creases into 16ths and punch holes in the middle of each section separated. Then avery labels, or avery tabs, are secured in place for more reinforcement. Then strings are attached into each hole that is punched. These are the shroud lines, which secures the parachute to the object that needs to have the parachute for a safe landing, and a good recovery chance. Then there is the procedure to secure the string (shroud lines) to the object that needs the parachute (which is a nose cone that has a tennis ball in it for weight). After hole punching around the top portion of the nose cone, then I tied strings to each hole and then I tied the strings to the other holes in the parachute (as I said earlier) and created a parachute that hangs on to the recovery portion of the rocket. After that, the recovery system of my rocket is finished.
Making of the Fins (Wings)
The fins will probably be a diagonal wing that comes from a low point of the rocket, and then there would be an attached point that straightens out to a horizontal piece of cardboard and then it would be attached to the fuselage and then it would come down to the base of the launch pad or somewhere like that. Although drag is quite heavy on the fins in this situation, at least it does not fall off the rocket like the fins with a obtuse angle on it. Most of those fall off, but it is the best to defeat drag. But the risks are too high, since most of the rockets with that design of the fin usually falls off. I'd like the fins to stay on for the flight, and come down with the rocket piece that does not use the parachute.
Container for the Egg (prototype plan)
The container for the egg will probably be attached to the object that carries a tennis ball for weight, which is also attached to the parachute for a safe landing (it is attached to the recovery system). My plan on the day would be to have the container of the egg to be attached to the tennis ball (secured by tape) and then the egg will most likely land safely.
Final plan for Egg
The final plan for this egg problem will be solved by just held on the recovery system, or the object tied to the parachute that will land safely and tow the main fuselage to the ground with it. Hopefully there is newspaper or something that I can hold the egg with. I will make a newspaper basket or something that will hold the egg safely and haul the whole rocket fuselage with it to the ground, meanwhile not breaking any part of itself (detachment, breaking of the shroud lines, or breaking of the canopy).
Newton's Laws of Motion applied to the Rocket
Newton's 3 Laws of Motion apply to all moving objects on Earth, as they are all acted upon many forces and change when going to different directions. Newton's first law - An object at rest will remain at rest; an object in motion will remain in motion at constant velocity (speed and direction) unless acted upon by an unbalanced force, is acted upon many everyday examples. Maybe one will inspire you to life: A car in the countryside, driving on the road will not stop unless acted upon by another force, which would be the brake of the car. Although the car has stopped, the people inside will not stop unless there were seatbelts fastened. Most likely though, if they have any objects tied to the roof of their car, they will probably fall onto the road and be broken after that shock impact. Now to apply this to the rocket, the force that is moving the object (or powering it) is water from the bottle, and the force trying to stop it in air is friction (or drag) that will hit it to apogee and make it fall back down safely (hopefully safely) with the recovery system. Newton's second law is of no use in this situation, but Newton's third law is probably the most important. The acceleration and movement of the rocket is opposed by the friction of the air, which will force it onto apogee.
History of Rocketry (and Rockets)
The history of rockets really began quite long ago, at around 100 BC. But those were pretty much only myths and no real usage of rockets were performed. For instance, one would be a Chinese official who wanted to travel to the moon tied 47 rockets to a chair and started flying. He blew up mid-air and once the smoke was gone, this Chinese official was gone. These were the myths that were being told until the year AD 1232, when the Chinese were the ones who used the rockets. The Chinese started using rockets in battle, and used them for fireworks displays too. Really, these firework like objects can be lethal in battles, and are very important in the Chinese arsenal. The Chinese used rockets against the Mogols who were besieging them during the battle between Chinese and the Mongols. Until the recent 20th and 21st century, most rockets were used for military issues and in battles (warfare). Between the 13th and 15th century, an Italian scientist invented surface running rocket-powered torpedoes that could be fired at enemy ships; and in the 16th century, a scientist drew the first drawing of a staged rocket. By the 18th and 19th century, the British have invented rockets that were used as weapons and could fire 9,000 feet. These were used against the United States in the battle of 1812. The inspiration for these rockets came when the Indians bombarded the British troops in India with their own rockets, and forced the British army to run for their lives. By the late 19th century and early 20th century, the inventors found out there were other usages for these weapons. For instance, the Congreve rocket, the ones used by the British army, could send lines to stranded ships. Thousands of lives were saved by this technique in 1914. Finally, a Russian teacher revealed that if the rockets used liquid fuel and turned it into gas and made it escape as thrust, then the rockets would have greater range. After World War Two, the countries started to build rockets for outer space, instead of only using them in warfare. The Russians first achieved to launch an artificial satellite into orbit, and it was named Sputnik. The Americans were devastated as a few months later, their rocket toppled over on the launch pad due to insufficient amount of thrust. Although the Americans did not achieve the first artificial satellite, they were getting closer and closer to the moon, as the Russians did not proceed as far as the Americans. By the end of the 1950s, the Americans had already reached to within 37,000 miles of the moon before going into solar orbit. The creation of the National Aeronautics and Space Administration was created on October 1st, 1958. In 1961, the first man to be orbiting the Earth was Alan B. Shepard, and returned safely. In the late 1960s, NASA launched Saturn V (5 in roman numerals). This was the most powerful of the Saturn family, as it created as much energy as 85 Hoover Dams. The crowning achievement of this rocket was found when it launched and carried Apollo 11's crew onto the Moon in July of 1969. The last 3 Apollo missions used the LRV, or Lunar Roving Vehicle, which enabled the astronauts to travel over several miles away from the Lunar Landing Site. Now, in the 21st century, we expect to see more and more advanced spacecraft and space shuttles sent to space, with decreasing amounts of accidents occurring with this modern technology.
Construction of the Altimeter

Our altimeter is constructed in a very simple construction plan. It is a protractor with the angles on it, and it would have an eraser and straw attached to it. Before you look at the procedure of this construction, please notify yourself with the needed and appropriate materials for this construction. Here as follows: a protractor, an 8 to 10 inch string, an eraser, a straw and massive amounts of tape. The following is the procedure of the construction of this home-made altimeter: First, get your protractor, tie a piece of string to the position where when you measure angles you place the verticies under that point; Secondly, tape that end onto the protractor itself to secure that into position. Thirdly, tie and tape the other side with an eraser, just like what you did to your protractor. Then, the fourth step would be taping the straw next to the base of the protractor, which makes it a tube where you could look through, and then measure the degree. The operational process of this home-made altimeter is revealed in the next section.
Operational Process of the Altimeter
So, now the big question is how to operate this altimeter. There are a few materials that you need before hand, which are as follows: your altimeter, a table of tangents, a calculator (or you could choose to use mental math). Lets presume that you are looking upon an object with quite a high altitude. You look up through your straw, and if your finger is not in the path of the eraser and string, you will find that it is hanging down in an angle you can read. Push the string onto the protractor wherever it lands, and whatever the angle is, is the angle that you have. Now, to find how high the object is, subtract 90 by this angle. Lets say the angle you got was about 55 degrees. Subtract 90 by 55 and you would get 35 degrees. Then use this new angle to find the tangents in the table of tangents. 35 in the table of tangents is 0.7. Then use the distance you stand from the object and multiply it to the tangent found on the table and you would get your height. Lets say you were 100 feet away from the object you were looking at. 7 hundreths multiplied by 100 would get 70. Therefore the height of your object you were looking at was 70 feet. This would apply to any object you are looking at from a distance of 100 feet. The angles change in the distance you are from the object, but the height would be the same, because the height is a constant, and it doesn't change unless there is a force pushing it still. This system would apply to any object in a distance within 1 kilometer, because further than that, you would probably not be able to see it.
Collection and Construction of Recovery System
The recovery system's different parts need to be collected and constructed together to make the full recovery system to put on my rocket. The parachutes and shroud lines, and the nose cone (with the punched holes for the shroud lines) are all assembled to create a recovery system that would hopefully bring my rocket back to the Earth with minimal to none damage applied to it. The attachment of the tennis ball for weight and the attachment of the nose cone is crucial for the flight itself. The first one helps the landing pod have enough weight to fall out of the rocket at apogee, and the latter helps reduce drag from the liftoff itself.
Finishing Touches and Detailed Perfections
The details and the finishing touches were simple and didn't take more than five minutes until completion. These were just the taping and the finishing touches to the nose cone at the tip of it. The nose cone needed to be perfected for the flight to make the hole at the tip disappear. Taping was needed and then the rocket was all complete and ready for the launch day.
*note: all text written above this astrocoal (star to the left) is written before launch day.
Flight Result
Flight Results of July 26th, 2007:

JJ's two flights:
1st flight: Altitude of Apogee - 18 feet; Angle of Altimeter - 80 degrees
2nd flight: Not recorded in data
Jason's two flights:
1st flight: Altitude of Apogee - 290 feet; Angle of Altimeter - 19 degrees
2nd flight: Not recorded in data
Ken's two flights:
1st flight: Altitude of Apogee/Angle of Altimeter - not recorded; Time to Apogee - 1.09 sec.
2nd flight: Not recorded in data.
Link to National Aeronautics and Space Administration (NASA)
Click here: http://www.nasa.gov

Taylor's rocket!!!

In the next 3 weeks the class is going to make a water rocket. That will be able to go very high in the air (hopefully). Right now we are working on the parachute so far I only need to tie on 13 more strings. We are trying are best to make are parachute and our rocket stable and will not fall apart! Here is a cool site that you can get lots of information about water rockets! http://ourworld.compuserve.com/homepages/pagrosse/h2oRocketIndex.htm
Now that I finished my rocket I'll tell you how long it took me to build everything. First off we have the parachute, it took me along time to do the parachute because it was a pretty complicated design! First I had to fold a lot till I got the body of the parachute then I had to put on the strings. After that I got my safety tabs so the parachute doesn't rip from the strings. (That whole process took me at least 5 days!) In the next week I started to work on my fins for my rocket, (I had already finished shaping my body for the rocket) It took me a long time to make my wings. The first thing you have to do is draw what kind of wing you want after that you have two make the wing a inch longer so you have some room that you can put the wing on your rocket. But before you can put the fins on your rocket you have to score on the line that you drew.(Your rocket has to have at least 3 wings on it to make it stable) When your done with that you can start on trying to connect your fins to the rocket, when your done with that you have to work on your recovery system. (The rocket wings took me about 3 days) In the recovery system you have to connect the strings to a cone and you can connect a pyramid to it for less air resistance! Then after that you can connect it to your rocket and put a tennis ball in it for weight and you done! (The whole procedure took me 16 days)

myspace myspace

Animated GIFs

Animated GIFs


Here's one of Newton's laws of motion. And how it has to do with my water rocket. I think that Newton's second law of motion has to do with my water rocket. Newton's second law is Mass equals Mass times Acceleration. It has to do with my water rocket because when the water spurts out of the rocket (the force) it hits the ground (the mass) it soars upward (the Acceleration).

Jennifer


HYDRO ROCKET

Over the next three weeks, our class, with the help of our teacher Mrs. Nelson, will construct a rocket. Not just any rocket though, ours will be powered by WATER, instead of fuel. We will blast off the hydro rocket on the Thursday of the last week.


DAY ONE: We didn't really work on any part of the rocket today. Mrs. Nelson gave us a packet telling us how to build a rocket and a parachute. I spent a lot of the class trying to untangle a huge knot. :P


DAY TWO: Today we started the construction of our parachute. The parachute would be made out of a huge garbage bag. I chose to do the method of cutting the garbage bag into 20 strips, then gluing them back together as a circle. We didn't have enough time to finish making the parachute, but we got a good start.


DAY THREE: We went swimming for half an hour today and didn't work on our rocket. We also did an experiment where Mrs. Nelson put some alcohol in a corked bottle then pressurized it. After she uncorked the bottle, the alcohol inside exploded into white gas. We did the experiment again adding some blue food coloring with the alcohol. However, the alcohol still exploded into white gas. I still have no idea why that happened. =.= Here's a cool link about the first ever manned water rocket launch that my class is obsessed about. XD


DAY FOUR: I finally finished gluing together my parachute strips today. :D I still have to repair all the gaps and tears everywhere, but I'm doing that tomorrow. I also got a good start at the body of the water rocket. We're using these big knife things to cut our rockets. It is SOOOOOO HARD to cut up the plastic bottles!!!!!! >:(


DAY FIVE: We went swimming again. When we got back we got to watch a movie about how the Wright brothers and their quest of flight. I thought i learned a lot from that movie, like wing warping and stuff. I started and finished tying on the strings to the parachute. The parachute STILL rips and tears in places and I'm almost positive its not going to get off the ground. WAAAHHHH T.T Heres a really random movie about diet coke and mentos which has nothing to do with rockets, but its really awesome. :D
DAY SIX: I spent around half an hour today repairing and regluing my parachute. I also made a nose cone for my rocket. It's 5 pieces of cardboard taped together. It's kinda bendy and it's probably going to get knocked off by the force of the air hitting it. I've decided to reinforce it with adding more duct tape. :D Something i really really really REALLYY like... is WOLVES THEY SO CUTE AND FLUFFY AND COOL:P I found this cool looking wolf while i was looking for nose cone pictures.


DAY SEVEN: We watched another movie today called A Century of Flight. It told us all about the history of airplanes. From the Wright brothers plane to the modern Boeing 747 commercial plane. There was also this part in the movie where a plane dropped an atomic bomb in Japan. I found a movie of an atomic bomb exploding, its really cool. It looks kinda like a huge mushroom=]


DAY EIGHT: We're halfway through summer school!!!!! I spent all my time today making a pouch for my egg. I took the leftover pieces of garbage bag and used it for padding.


DAY NINE: We learned how to find an objects height using the altimeter. 90 degrees subtracted by the angle then multiplied by the baseline. I also worked more on my parachute. The lines keep getting tangled. :( I hate my parachute. I also made some ninja stars out of paper. :D


DAY TEN: We watched another movie today. It was about how airplanes could stay up in the air. Apparently an airplane needs; gravity, lift, drag, and thrust to fly. Gravity is created by the Earth. Lift happens because of the airplanes wings. An airplanes wings are designed so that the air on top is faster than the air underneath, causing the airplane to rise. Gravity and lift are fighting against each other. The planes lift has to be stronger than the Earth's gravity for the airplane to fly. Thrust is caused by the airplanes engines, an drag is caused by air. Thrust and drag also fight against each other. I worked more more on my egg holder thing and my parachute. I tested my parachute many times today and it always goes straight down :D I still haven't figured out a way to put it in the rocket with it getting tangled. :(

DAY ELEVEN:
I didn't really do much today because I've finished most of my rocket. We watched a movie today about pressure. In the movie it showed us how pressure can be used to lift heavy objects such as mammoths and power big machines, Such as a pnematic drill.We were also asked to think about how much pressure we wanted in our hydro rocket. I think I'm going to ask for as much as possible, because then the rocket will go up in the air higher.

DAY TWELVE: Today we made these mini rockets out of film canisters and Alka-Seltzer. They're so small and cute compared to the ones we've been making for the past 2 weeks. :D WE used index cards to make the nose cone and the fins. Then we went outside on the playground to test them out. Some people's rockets, like Katerina's just lay there and fizzed when we added the Alka-Seltzer. :( Mine worked three out of the four times i tried it. Evelyn's rocket blew up in her face and got her splattered with water and Alka-Seltzer. :P Here's a link to some Alka-Seltzer rocket experiments.

DAY THIRTEEN: Andre, Charlie, and Brian are blasting off their rockets today because they're not going to be here tomorrow. I spent around 10 minutes improving my egg's padding. I also tried many different ways to put my parachute into my rocket. I found out that putting the parachute in the nose cone works the best. That's about all I did today...

DAY FOURTEEN: BLAST OFF DAY!!!!!! and second last day of summer school. Everybody blasted off their rocket at least 2 times. I spent over a week making my parachute and it didn't even come out when my rocket hit apogee. =.= sigh. But my rocket went pretty high both times. :D Sadly no one took my altimeter thingy for my first launch.

Heres the results of me and Emily's launches:

MINE
Distance from Rocket: 100ft
Angle of Altimeter: 46 degrees
Rocket at apogee: 97ft
Time to apogee: 3:24
EMILY
Distance from Rocket: 100ft
Angle of Altimeter: 58 degrees
Rocket at apogee: 62ft
Time to apogee: 1:83


Jason's hydro rocket


For the next three weeks will be making a hydro rocket (a water-powered rocket).
So far I have made a parachute that is attached to the top of my roc
ket which looks like the rocket above.
below are some websites teaching you how to make a water rocket.

http://ourworld.compuserve.com/homepages/pag
rosse/h2orocketsi.htm

http://zeta.lerc.nasa.gov/education/rocket/BottleRocket/launchpad.htm

http://www.nationalroboticschallenge.org/downloads/recources/Bottle_Rocket_Launcher.pdf
First day:
Today, we didn't really work on our rockets, all we did was and a game to learn about each other and we also did a experiment where we use balloons and create a rocket like balloon and then we have to see whose in the class can fly the farthest and in the end I was in second place.

Second day: We started working on our parachutes today, there were
three types and we had to choose one, then we started working on it.

Third day: I finished my parachute and started working on my rockets body like the one above


All three of Newton's law of motions will apply to my rocket when it is launched,
Newton's first law of motion: "An object at rest will remain at rest and an object in motion will remain in motion at constant velocity unless acted upon by an unbalanced force"
Newton's second law of motion: Force= MassxAcceleration"
Newton's third law of motion: "For every action there is an equal and opposite reaction"

Example:
In Newton's third law, it says that for ever action there is an equal and opposite reaction, so like the picture on the right, thrusts opposite is weight, and weights equal reaction is a friction.

Example:
Mass and Acceleration are needed to create force, so the rocket is the mass and the pressurized air is pushing on the water so when we release it, it will push the upwards which causes it the Accelerate and when you have both Mass and Acceleration it causes.

Example:
when the bottle is pressurized but the cap is not let go the bottle will not move until I realease it and when it is realeased it goes upward and keeps going, but while its going, the air will be pushing on it causing friction and slowing it down and it will soon stop because of the friction and will start coming down.

Today, I am making a egg pouch to put my egg, because for the test we not only need to make a rocket fly up using pressure and water, we also need to put a egg inside our rockets because we need to test if it is safe enough to have a human inside it so the egg represents the person.
Below is the table of scores that me and my buddy got


Emily


Day 1-Briefing

Today we were told what we were supposed to do in this Hydro Rocket class. We learned we are supposed to build a water powered rocket out of three plastic bottles, two tennis balls, foam board, plastic, and an assortment of other materials. Mrs. Nelson gave us examples of other student's work, and showed us how we would test them. She also gave us a few mind games to help us "think more like scientists".

Day 2-The Parachute

Today we started to make our parachutes, and I, unknowingly, chose the hardest to make of the three patterns we were given. So far, my parachute has started to look more like a tube with a big hole in one end than a parachute that's supposed to save my finished rocket from crashing to the ground with a CRASH BOOM CLANG CRUNCH. *sigh* Yesterday we started to design our hydro rockets, and almost every one had some futuristic addition, such as a laser or a fiery jet stream! I just sighed and got back to my own design.

Day 3-The Website


Today we went swimming and then spent time doing THIS. Yes, typing, typing, typing, clikkety clak clak clak. We haven't been doing anything with our rockets today, but I did find a cool link you can click on to go to a website that talks about parachute designs! Click here!

Day 4-The Parachute (continued)

I found a site on Google with a video of the "first manned water rocket launch"! Enjoy! Click here. Today we worked some more on our parachutes, and I gave up on my "very complicated parachute design". I opted for a simpler, yet sturdier version of the parachute. It is called a Tulip parachute, ( such as the ones you see in the picture at the right) and I finished the basic design in just under ten minutes! However, when I tested it, it went WAAAAAYYY over to one side, (*grumblegrumblegrumble*) so my parachute is still in progress.

Day 5-The Beginning (or . . . not)

Today I FINISHED my parachute and STARTED on the basic frame of my rocket. Yesterday, I drew the fins for my rocket on a sturdy foam board and cut them out with a scissors, but today I sanded the edges and attached them to my rocket with duct tape. Some of the other rockets are getting to look really great, even IF they don't have lasers and such.*sigh* To be honest, at this point I'm just hoping that my rocket will make it off the ground! I have recently found out from "unidentified sources" that my little brother's rocket is going to have a mini camera on it so it can take pictures during flight . . . assuming that it'll get off the ground . . .

Day 6-The Movie

I got a lot done today: the nose cone, the parachute, my fins, my design for the egg net, a doodle of a random thing or two . . . a pretty normal day. *cough cough* I am so tired because I stayed up 'till ten o'clock last night reading Fire Star.
We watched a movie today on the history of
flight and all the basics; Amelia Erhart and all the other record breakers. We learned about the Atomic bomb that the US dropped on Hiroshima in World War II, and the other bomber plains that were used. We learned that different points of view could have effected this movie, like the US could have considered the Hiroshima bombing a wonderful thing because it won the war for them, but Japan could have considered it a HORRIBLE thing because thousands of their people lost their lives! *siggghhhh*

Day 7- The Rocket

Today I tested my rocket and IT WORKED PERFECTLY! So, I started on my egg pocket. We figured out today that we have to have an egg in our roc
ket to simulate a human. Luckily, we get materials to cushion the egg when it falls to the ground. I am weaving an "egg pocket" this does egg-zactly what ti claims to do--it creates a pocket for my egg so it won't break!
We studied a little on Newton's three laws, and I have taken number three to liking: For every action there is an equal and opposite reaction. This means that if gravity is pushing you down, the Earth, in turn, is pushing you up! Isn't that awesome?!

Day 8-The Egg Pocket

I am continuing to make my egg pocket and I am not so sure anymore that it will fit. On the topside, we did go swimming again today and it was very refreshing in this hot weather.

Day 9-The Egg Pocket (continued)


Today I sewed my piece of weaving into a sort of hammock shape to cradle the egg. I punched holes into the base support for my egg pocket for the strings. I plan to attach strings to the hammock, then thread them through the holes in the base. By doing this, I can make sure that if the hammock swings one way, the string will prevent it from smashing into the side (and same with the opposite side of the hammock).
That's pretty much all I have to report toda
y . . . um . . . uh . . . bye, I guess.

Day 10-The Rocket

I'M DONE!!!! . . . I think. If I find anything else I need to add to it, then i'm not done, but, still . . . So, anyway, I don't have much to report today, except that we went swimming and we watched a movie on the concept of flight and the forc
es that make it possible (FYI: gravity, lift, thrust and drag).
All I did after we got back from swimming was work on my egg pocket. I had a lot of trouble fitting it into my rocket at first, but I cut a lot of bulk off of the top of the bottle and managed it in the end! All I need now is an egg . . .

Day 11-The Website

We watched a movie on different types of pressure today, and it was cool because, unlike the other movies we watched, it was ANIMATED! We learned a lot about hydrolic pressure and how it works. We learned that a CAT bulldozer and others like it use hydrolic pressure to help them lift things.

I guess that's pretty much all I have done today, although everyone else is still working on building their rocket. They aren't done yet!

Day 12-Goin' Small

Today we built mini rockets out of film canisters, water and Alka-Seltzer. We made the fins and nose cone out of index cards, and blasted them off using a mixture of Alka-Seltzer and water. Katerina's had a leak so she didn't get a good result for any of her blast-offs. Mine and Jennifer's went pretty high on all four launches, and Evelyn's b
lasted off in her face and almost took out her eye. All in all, it was a pretty good experiment!

Day 13-Examples

Three people blasted off their rockets today because they had to leave early for some camp or something, and I got some great tips! 1. Your fins can't be even the tiniest bit off center or your rocket will either fly to the side or spiral out of control. 2. You can't have too much wight at the nose otherwise it will hinder the flight height, and you can't have too little weight or the parachute won't come out when the rocket hits apogee. Go figure. 3. You get pretty soaked if you're within six feet of the rocket when it blas
ts off. STEP BACK OR REGRET IT.
When I finish typing this I have to make a mini helicopter thingy that's supposed to help me understand flight better. *sigh*
Oh well. I am excited about one thing: IT'S BLAST OFF DAY TOMORROW!!!!!!!!

Day 14-Done

We are done and were thoroughly soaked in our water balloon fight. I am posting the results for my rocket launch below:

Distance from rocket: 100ft
Angle of altimeter: 58 degrees
Rocket height at apogee: 62ft
Time to apogee: 00:02:50
Time from apogee to ground: 00:02:50

Well, good luck understanding it! Bye for now!